
Preparing for an MRI: Step-by-Step Guide – An MRI, or Magnetic Resonance Imaging, captures images of internal structures with strong magnets and radio waves. Doctors use the scans to spot damage, monitor conditions, and guide treatments without surgery. Preparation is vital because small choices affect comfort, accuracy, and efficiency in scanning. Being informed makes patients comfortable, minimises undue delays, and enables their findings to give doctors the best possible information for diagnosis.
Discuss Full Medical History
MRI machines rely on intense magnetic fields, which surprisingly act upon metal. Pacemakers and cochlear implants are notorious risks, but small objects are also a factor. Surgery clips, stents, or even the fragments of the shrapnel left behind from earlier injuries may present some problems. If you’re scheduled for a southern utah mri, your health care provider will ask about your medical history, so it’s best to share everything, even the small details. If in doubt, bring implant cards, medical records, or written reports to confirm whether devices are MRI-compatible.
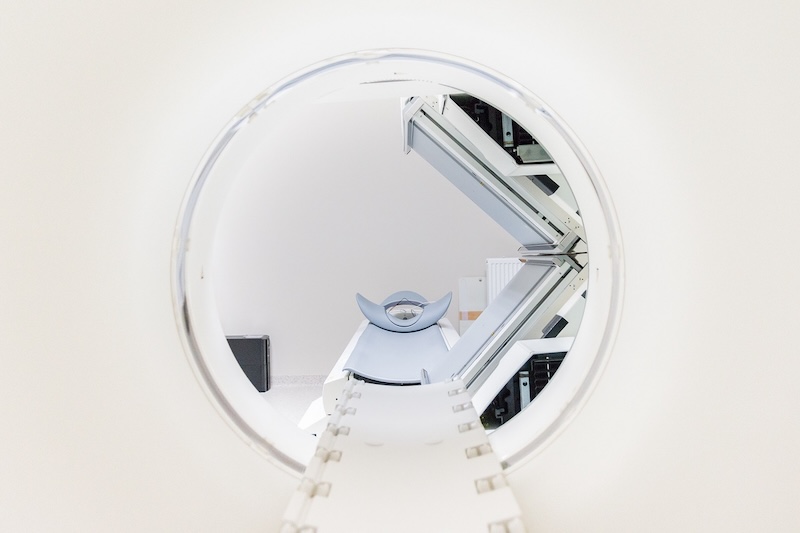
Confirm Scan Type Position
Not all MRIs are alike, and positioning plays an important role. Some are flat, but then on your face or angled. If you experience pain in your back or pressure in your sinuses, query the position of how you will be positioned in advance. Radiology facilities can generally make room for supports, cushions, or adjustments, but only if given advance notice. This knowledge helps you physically and mentally prepare, reducing discomfort once they begin the scan.
Practice Breath Control Early
Most MRIs, such as abdominal or chest exams, have controlled breath holds. You will typically be asked to hold your breath between 15 and 20 seconds while taking pictures. Blurring can lead to longer exams or rescans for those who cannot do this comfortably. Home practice before the exam, such as slow inhalation and comfortable breath hold, can increase your proficiency. The developed tolerance ensures accurate data and reduced time on the machine.
Request Improved Noise Alternatives
The sounds during an MRI are louder than most patients expect. The technologists sometimes provide foam earplugs, but the comfort level of all centers is not uniform. Some have noise-cancelling headsets or have you listen to music during the procedure. If you are extremely sensitive to sound, request them ahead of time rather than once you are on the table. Better noise control lessens your anxiety and allows you to remain still longer.
Skip Makeup and Lotions
Cosmetics need not be harmful, but some contain metal particles that interfere with imaging. Glitter makeup, mineral powders, or even sunscreens may produce biased results or heating effects under the magnet. Lotions containing metallic compounds can also lead to mild skin irritation during scanning. It is advisable to arrive with clean skin to achieve correct images and avoid unnecessary complications. Most patients find this a surprise requirement since it doesn’t make it into official preparation instructions.
Plan for Additional Heat
MRI suites are cooled to ensure equipment stability, so patients tend to become chilly. Remaining still in a light sheet for sometimes an hour enhances discomfort. Shivering patients are less likely to have good image quality. Request a blanket before scanning, instead of waiting until you feel uncomfortable. This little prep detail assists you in remaining relaxed and still during the test.
Schedule When Most Alert
The time of day influences the quality of scans patients can tolerate. If you’re drowsy or restless in the afternoon, don’t schedule during this time. Fatigue causes restlessness, reducing the quality of scans. Morning scheduling is generally best because patients are less restless and more alert. Scheduling according to your natural body rhythm reduces stress, increases stillness, and facilitates the process to finish more easily.
Empty Bladder Before Scan
Scheduling bathroom use isn’t discussed, but it does make a difference. Hurrying to urinate can work against you if you drink water while waiting. Coming to the scan with a full bladder brings on unwanted discomfort and restlessness. The best plan is to use the restroom before being called into the scanning room. That prevents mid-scan distraction and makes you more comfortable for the entire process.
Clarify Contrast Injection Method

Some MRIs require contrast dye, and delivery methods vary. Automated injectors push the dye quickly, creating a sudden cooling or warming sensation. Manual injections are slower and sometimes feel gentler. Knowing which method will be used prepares you mentally for the sensation. Many patients worry about unexpected warmth during contrast delivery, but foreknowledge removes this stress and helps you remain calm.
Communicate Clearly with Staff
You will always have a way to alert staff during the exam. Usually, this is a squeeze ball or communication button. Many patients hesitate to use it because they worry about disrupting the procedure. Technicians would rather pause briefly than redo an entire sequence because of movement. If you feel un-comfortable or anxious, speak up soon so the team can adjust it for you. Communication is a time saver and results enhancer.
Prepare for Mild Fatigue
Most individuals can continue with their routine as soon as they undergo an MRI, but there is a potential for mild side effects due to the contrast dye. You could experience transient fatigue, metallic taste, or short-lived chills. Programming more light activities for the rest of the day is prudent. If sedation was used, avoid driving and arrange transportation home. Even without side effects, giving yourself space to rest makes recovery smoother. Knowing this in advance prevents surprises and unnecessary stress afterward.
Request Copies of Images
After the scan, most patients expect to wait for results through their physician. Many do not know that most facilities can provide copies of images immediately on a CD or through a secure digital portal. Having your pictures immediately is valuable if you need a second opinion, change doctors, or simply want personal medical records. Collecting them during your visit saves time later and gives you greater control over your care.
MRI preparation is less about rules and subtle details that improve comfort and accuracy. Sharing complete medical history, clarifying scan type, and practicing breath control reduces repeat imaging. Managing noise, avoiding metallic cosmetics, and scheduling wisely help you stay still. Requesting images secures your records, and staying well-hydrated the day before supports smoother contrast processing and overall comfort.
Poppy Watt